

Create Your First Cluster
This guide will help you set up your first Edka cluster.
Prerequisites
Section titled “Prerequisites”- A Hetzner Cloud account
- A Hetzner Cloud API token with read/write permissions
- Kubectl (Kubernetes CLI - only necessary for advanced operations)
- Lens - a Kubernetes IDE (optional but recommended for managing your cluster visually)
If you don’t have these yet, see our Prerequisites page for detailed instructions.
Note: Kubernetes knowledge is not required to use Edka, but it can be helpful for advanced operations.
Step 1: Create an Edka Account
Section titled “Step 1: Create an Edka Account”- Go to console.edka.io and click Create Account
- Sign up using your email or Google account
- Verify your email address
Step 2: Connect Your Hetzner Account
Section titled “Step 2: Connect Your Hetzner Account”- In the Edka dashboard, navigate to Integrations > Hetzner
- Enter your Hetzner API token
- Click Save
Edka will verify your token and establish a connection to your Hetzner account.
We’ll store your token encrypted and use it to create and manage your clusters.
You also have the option to use a temporary Hetzner token (not stored) during cluster provisioning. All future operations will require to provide the same token to interact with your Hetzner account.
Step 3: Create Your First Cluster
Section titled “Step 3: Create Your First Cluster”- In the Edka dashboard, navigate to Clusters
- Choose a name for your cluster (e.g., “clusterone”)
- Click Create Cluster
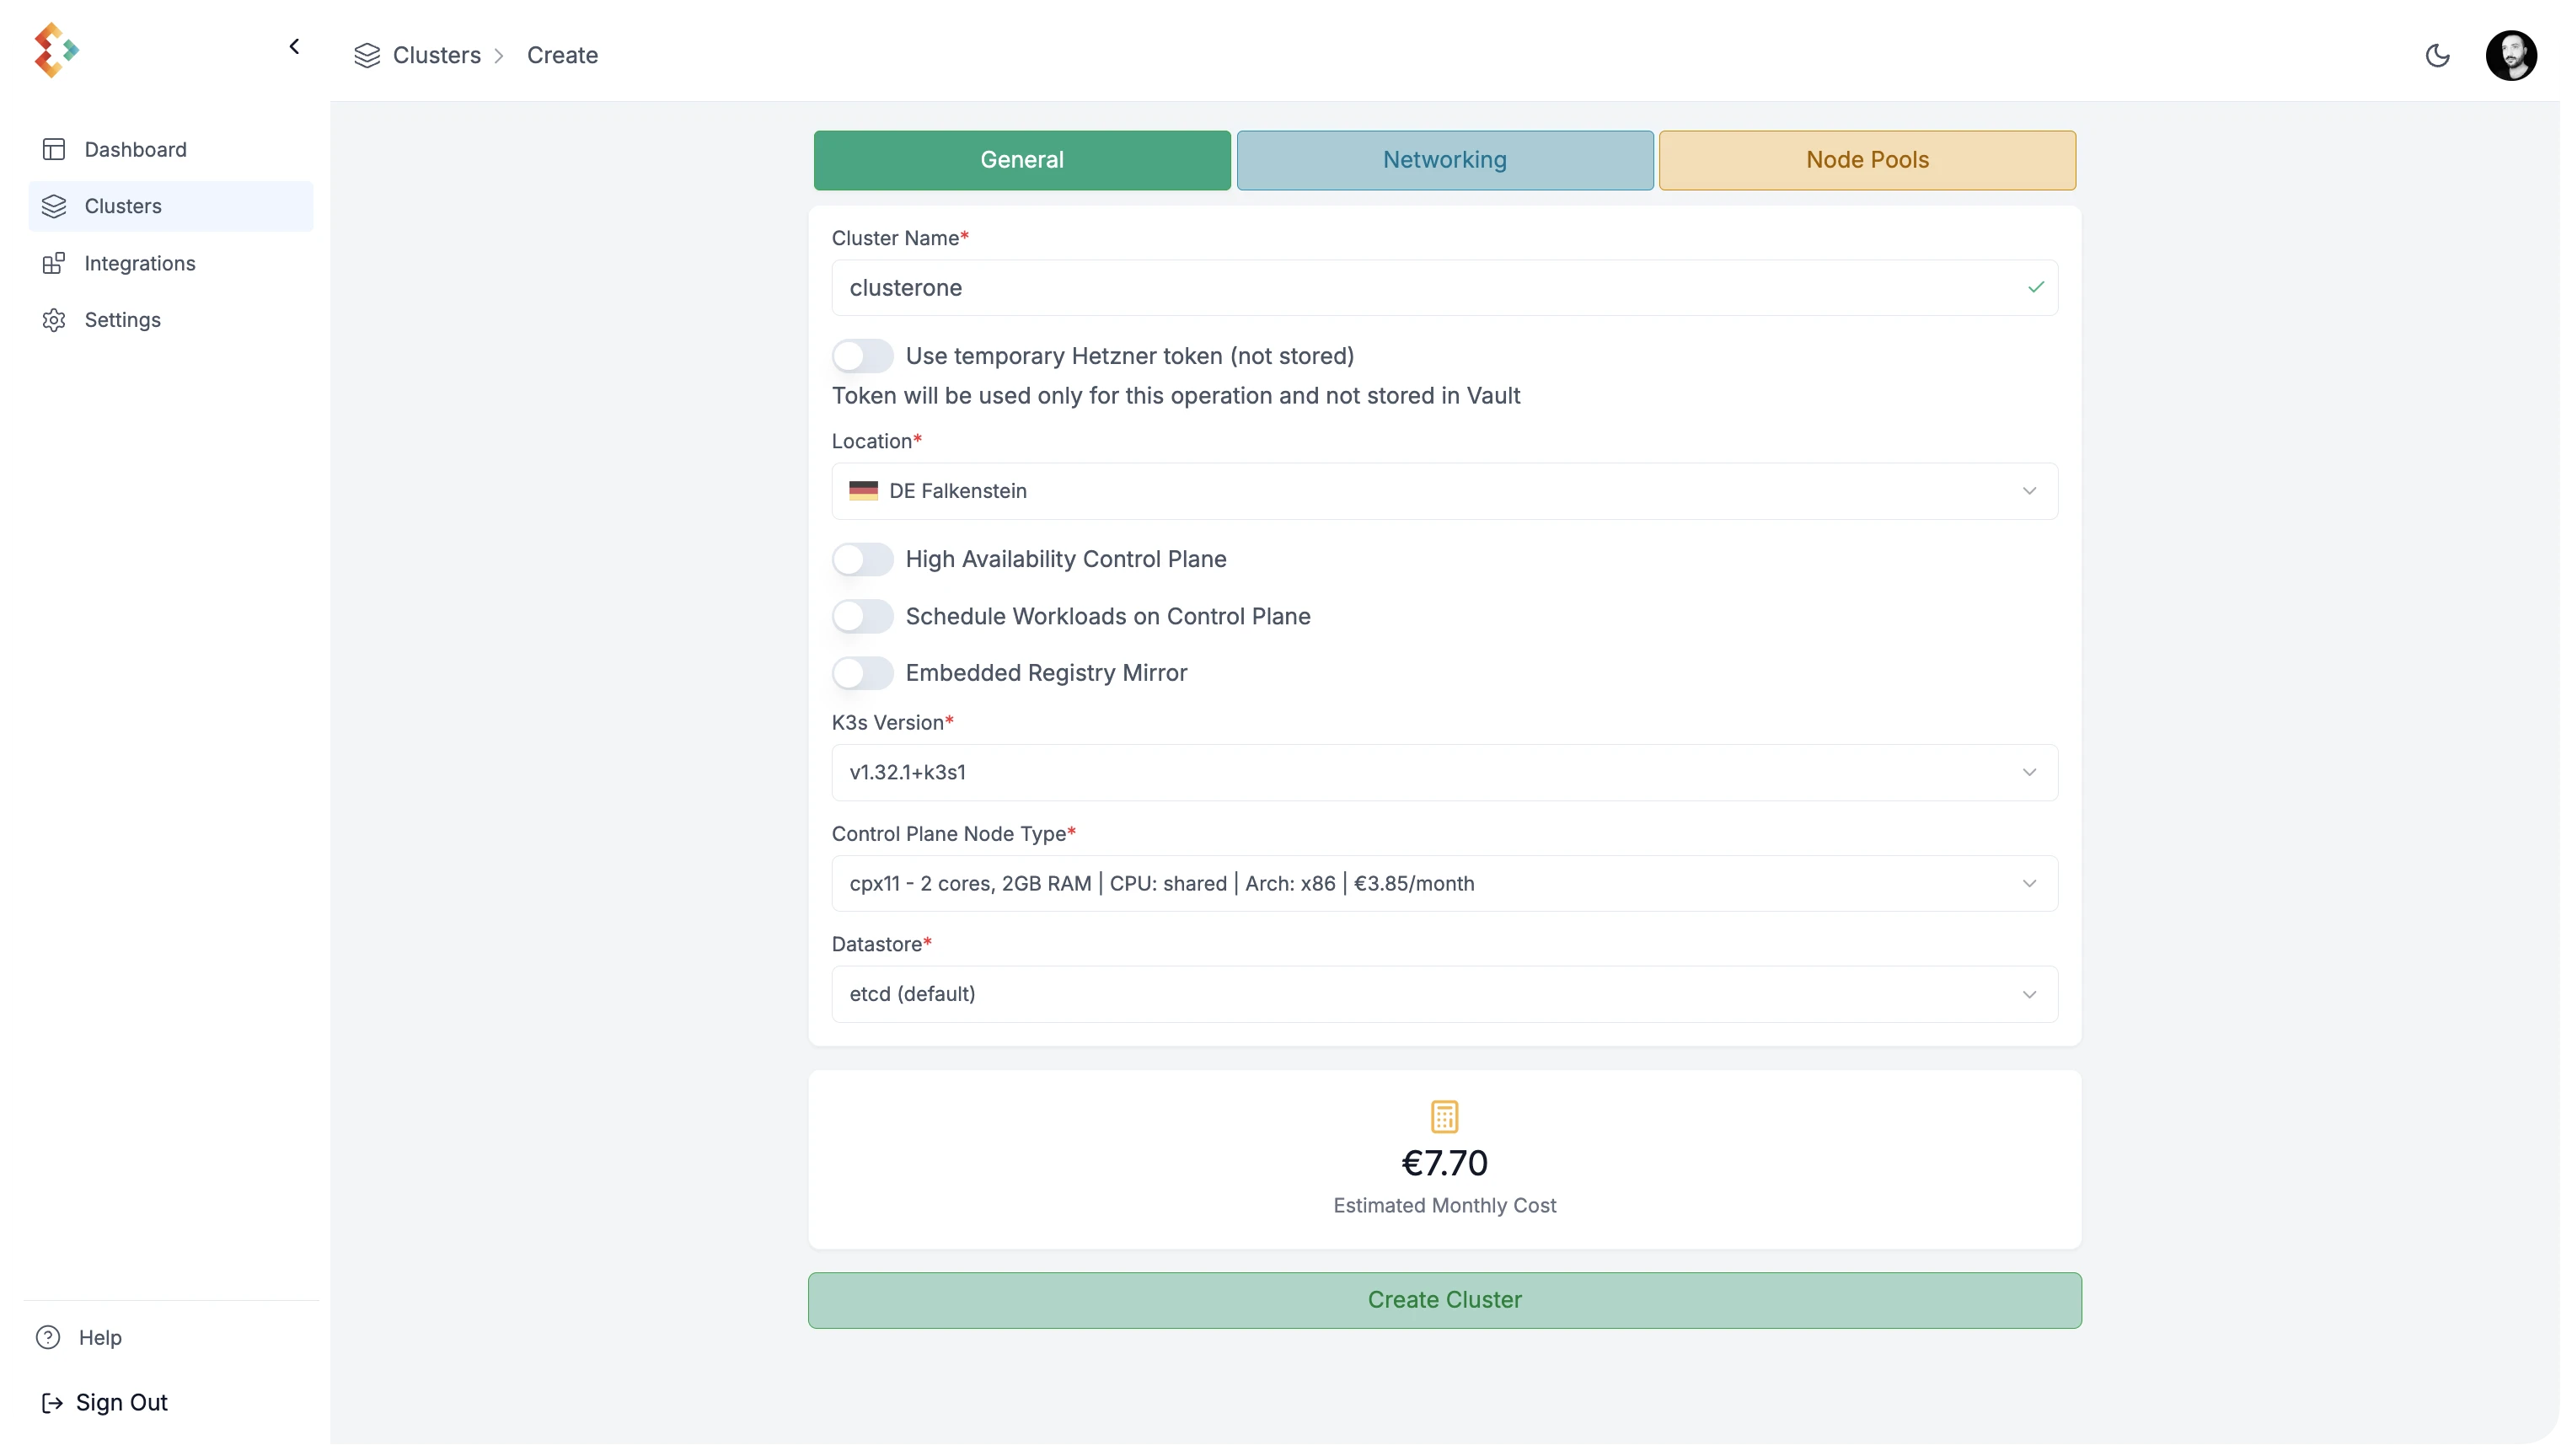
Optional settings:
- Cluster location (e.g. Nuremberg)
- Kubernetes version (e.g., 1.32.1-k3s1)
- Instance type for control plane and node pools (e.g., CX21)
- Set a highly available control plane (recommended for production)
- Customize the network settings in the Network tab
- Choose the number of instances and node pools in the Node Pools tab
- Use temporary Hetzner token (not stored) or store the token for future operations
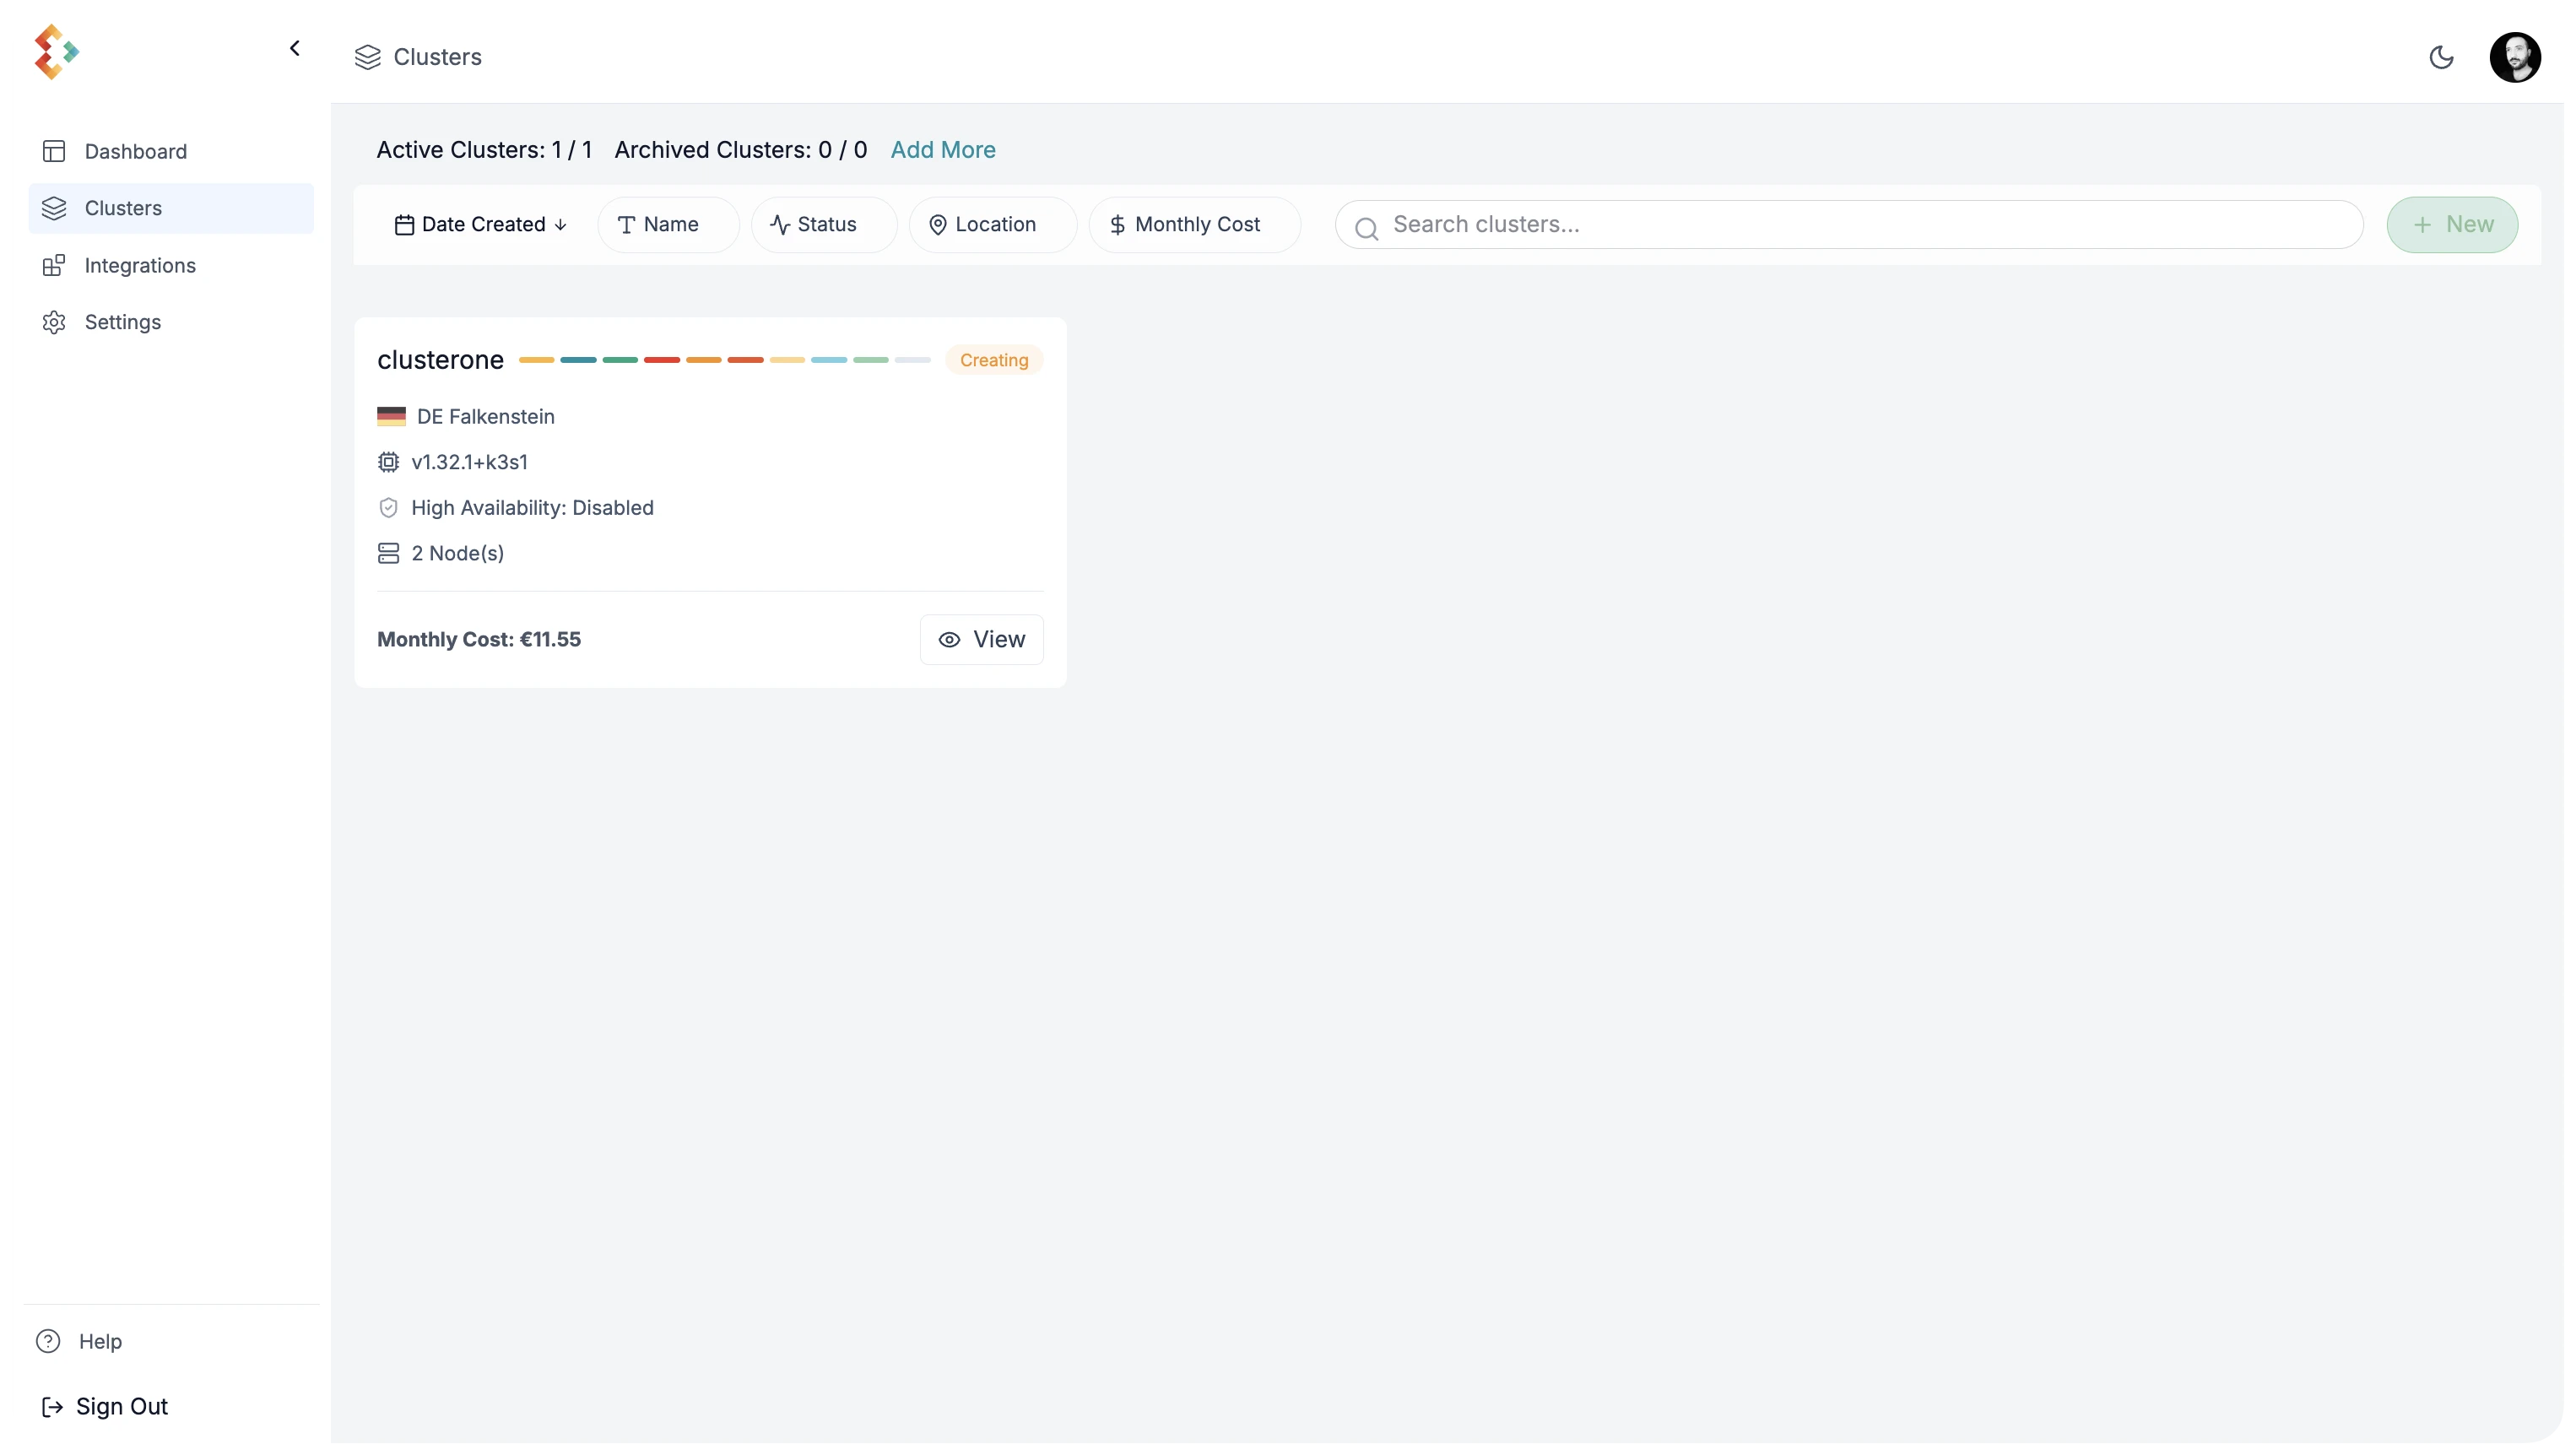
Edka will provision your Kubernetes cluster in about 2 minutes. You’ll see progress as the process completes.
Step 4: Access Your Cluster
Section titled “Step 4: Access Your Cluster”- In the Clusters dashboard, click on your cluster name
- Click Download Kubeconfig tab
Set the KUBECONFIG environment variable to point to the downloaded file:
export KUBECONFIG=/path/to/your/kubeconfig.yamlVerify the connection to your cluster:
kubectl get nodesYou should see a list of nodes in your cluster:
NAME STATUS ROLES AGE VERSIONone-master1 Ready control-plane,etcd,master 2m30s v1.32.1-k3s1one-pool-default-worker1 Ready worker 1m45s v1.32.1-k3s1one-pool-default-worker2 Ready worker 1m45s v1.32.1-k3s1Alternatively, you can use Lens to manage your cluster visually. Just add the kubeconfig file to Lens and connect to your cluster.
Next Steps
Section titled “Next Steps”Now that you have your first cluster running, let’s set up some add-ons to transform it into a full-fledged PaaS: